Renovations can leave your home in disarray, with dust and debris scattered everywhere. At Bumble Bee Cleaning Services, we understand the challenges of post-renovation cleanup and how overwhelming it can be.
Our guide will walk you through the process of tackling this mess like a Seattle pro, ensuring your newly renovated space shines. We’ll cover everything from essential tools to step-by-step cleaning techniques, helping you restore your home to its pristine condition.
What Lurks After Renovation: The Hidden Challenges
The Invisible Invader: Dust and Debris
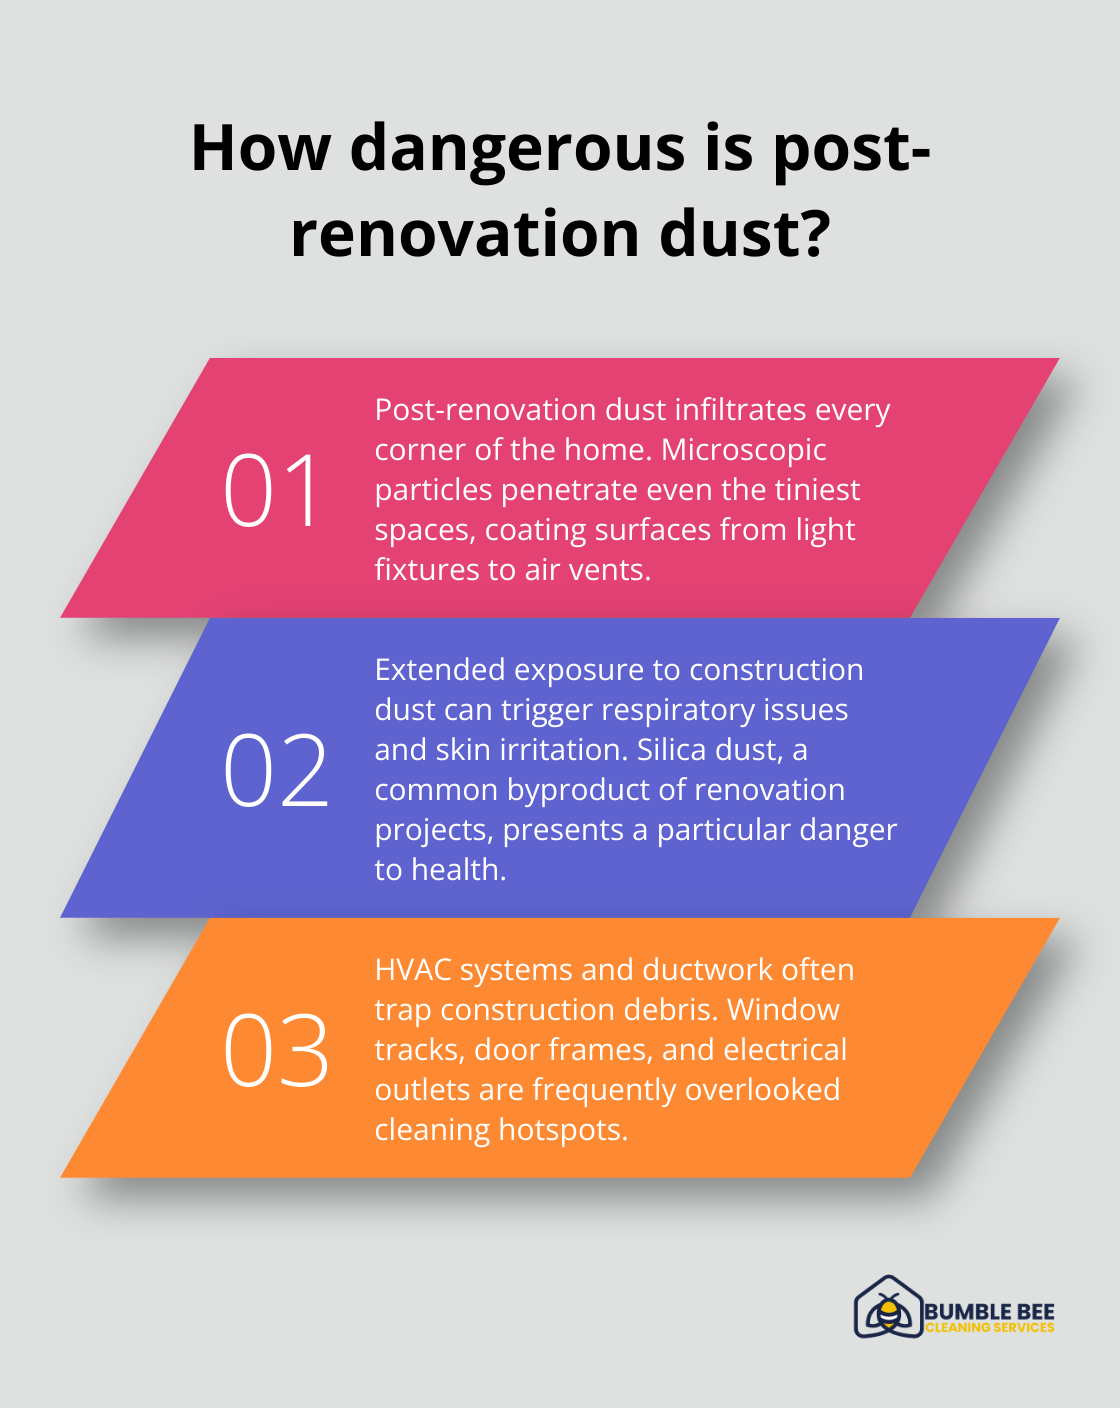
Post-renovation dust infiltrates every corner of your home. It’s not just the visible layer on surfaces; microscopic particles penetrate even the tiniest spaces. This fine dust coats everything from light fixtures to air vents, creating a cleaning challenge that surpasses simple dusting.
Hidden Hotspots of Grime
While floors and countertops stand out as obvious cleaning targets, many homeowners overlook crucial areas. HVAC systems often become dust magnets, with ductwork trapping construction debris. Other frequently missed spots include window tracks, door frames, and even electrical outlets.
Health Hazards in the Aftermath
Post-renovation debris poses significant health risks. Extended exposure to construction dust can trigger respiratory issues, skin irritation, and even long-term health problems. Silica dust, a common byproduct of renovation projects, presents a particular danger.
Tackling Tough Residues
Paint splatters, adhesive remnants, and grout haze stand as stubborn leftovers that demand specialized cleaning techniques. For paint overspray, professional-grade citrus-based solvents prove effective without harsh chemicals (aligning with eco-friendly cleaning approaches).
The Professional Advantage
Given the complexity of post-renovation cleanup, many homeowners turn to professional cleaning services. These experts possess the tools, knowledge, and experience to address all aspects of post-renovation mess efficiently and thoroughly. They ensure no spot goes uncleaned, from the most visible surfaces to the easily overlooked nooks and crannies.
As we move forward, let’s explore the essential tools and products you’ll need to tackle this challenging cleanup process effectively.
Essential Tools for Post-Renovation Cleanup
Post-renovation cleanup demands specific tools and products to effectively tackle the mess left behind. This section outlines the essential equipment you’ll need for a thorough clean.
High-Powered Vacuum with HEPA Filter
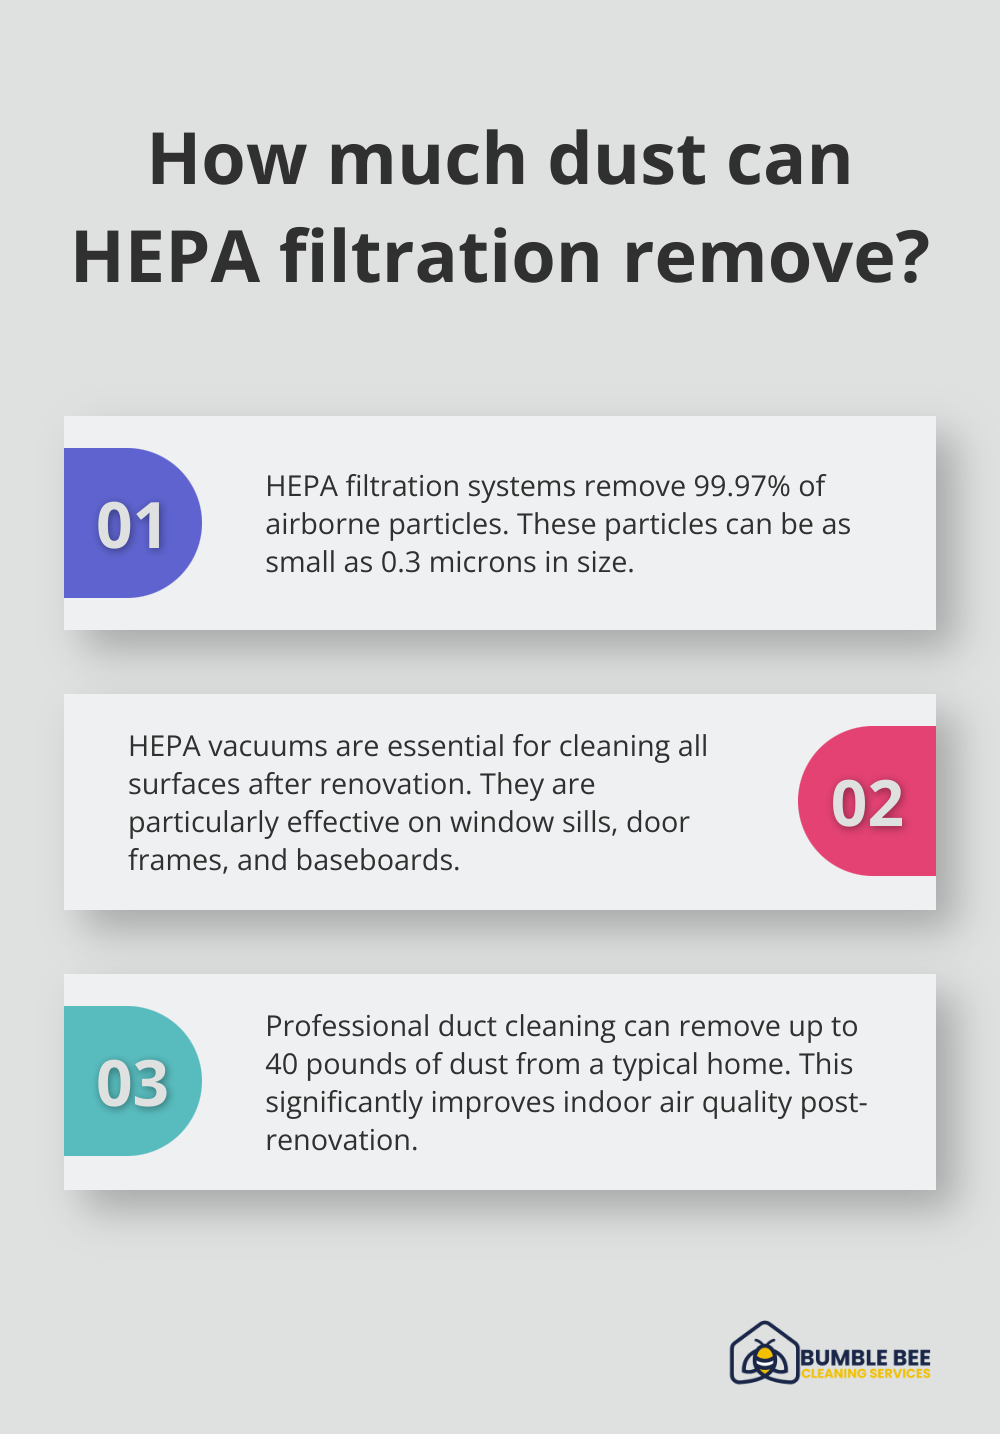
A vacuum with a HEPA filter stands as a non-negotiable item for post-renovation cleanup. HEPA filters can theoretically remove at least 99.97% of dust, pollen, mold, bacteria, and any airborne particles with a size of 0.3 microns. This level of filtration removes fine construction dust that lingers in the air and settles on surfaces.
Microfiber Cloths and Mops
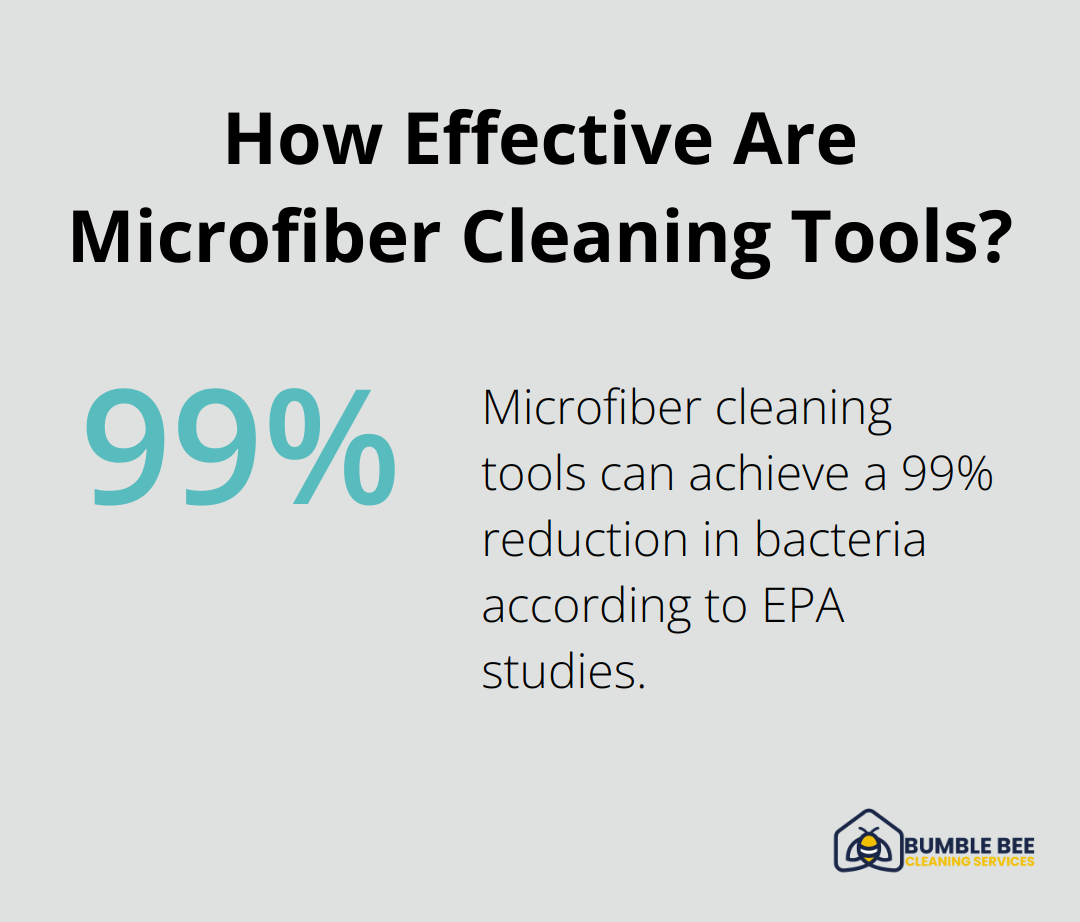
Microfiber cleaning tools excel at dust removal. They can achieve a 99% reduction in bacteria according to EPA studies. These tools clean walls, baseboards, and other surfaces where dust accumulates with remarkable efficiency.
Eco-Friendly Cleaning Solutions
Green cleaning products, certified by organizations like Green Seal and EcoLogo, offer both effectiveness and environmental responsibility. For tough residues like paint splatters, citrus-based solvents provide a powerful yet eco-friendly alternative to harsh chemicals. These products align with Seattle’s focus on sustainability and create a safer environment for occupants.
Protective Gear
Safety takes priority in post-renovation cleanup. The Occupational Safety and Health Administration (OSHA) recommends wearing protective gear including:
- N95 respirator masks to filter out fine particles
- Safety goggles to protect eyes from dust and debris
- Gloves to shield hands from harsh cleaning agents and sharp objects
Specialized Tools for Specific Tasks
Certain cleanup tasks require specialized equipment. A steam cleaner deep-cleans carpets and upholstery, while a pressure washer (set to 1500-2000 PSI as recommended by the Pressure Washer Manufacturers’ Association) tackles exterior surfaces like decks and siding.
The right tools set the foundation for effective post-renovation cleanup. However, knowing how to use them properly makes all the difference. The next section will guide you through the step-by-step process of tackling your post-renovation cleanup like a true Seattle pro.
How to Clean After Renovation
Prepare the Space
Remove all large debris and protect surfaces that don’t need cleaning. Cover furniture and fixtures with plastic sheeting. Open all windows to improve ventilation. The EPA states that proper ventilation significantly reduces indoor air pollutants during cleanup.
Use a shop vacuum to remove larger particles and debris. Work from top to bottom, starting with ceilings and light fixtures, then move to walls and floors. This prevents recontamination of already cleaned areas.
Combat Dust and Fine Particles
HEPA filtration plays a key role in removing fine dust. Use a HEPA vacuum on all surfaces, including often-overlooked areas like window sills, door frames, and baseboards. Sustainable cleaning methods significantly improve indoor air quality. The use of HEPA filtration systems removes 99.97% of airborne particles as small as 0.3 microns.
For vertical surfaces, use damp microfiber cloths. They trap dust without spreading it further. Microfiber mops are more effective and environmentally friendly. According to a 2019 study favoring green cleaning products, they are highly efficient in dust removal.
Clean Specific Surfaces
Different surfaces require tailored approaches:
Walls: Use a damp sponge with a mild detergent solution. For textured walls, a soft-bristled brush helps dislodge stubborn dust.
Floors: Clean hardwood floors gently with a pH-neutral cleaner to protect the finish. For tile, use a steam cleaner to remove grout haze and stubborn dirt. The Tile Council of North America recommends pH-neutral cleaners for new grout.
Fixtures: Clean light fixtures, ceiling fans, and vents with a microfiber cloth dampened with an all-purpose cleaner. Pay special attention to often-neglected areas like the tops of door frames and window casings.
Eliminate Stubborn Residues
Paint splatters and adhesive residues often require specialized treatment. For paint overspray, citrus-based solvents work effectively and eco-friendly. Always test on an inconspicuous area first.
For adhesive residues, a mixture of warm water and dish soap often does the trick. For tougher spots, a commercial adhesive remover may be necessary. Always follow manufacturer instructions and wear protective gear when using these products.
Address HVAC Systems
HVAC systems often trap significant amounts of dust during renovations. Consider professional duct cleaning to improve indoor air quality. The National Air Duct Cleaners Association (NADCA) reports that a thorough duct cleaning removes up to 40 pounds of dust from a typical home.
Final Thoughts
Post-renovation cleanup presents a significant challenge, but you can restore your space to pristine condition with the right approach. Professional post-renovation cleanup offers numerous benefits, including specialized equipment, extensive knowledge, and experience to tackle stubborn residues efficiently. Experts ensure thorough cleaning of all areas, including hard-to-reach spots and HVAC systems, which significantly improves indoor air quality and protects your health.

We at Bumble Bee Cleaning Services understand the complexities of post-renovation cleanup. Our team uses advanced techniques and eco-friendly products to deliver exceptional results. We offer comprehensive post-construction cleaning services tailored to your specific needs, ensuring your newly renovated space shines.
Professional post-renovation cleanup saves time, protects your investment, and creates a healthier living environment. You can focus on enjoying your newly transformed space while experts handle the cleanup. Let Bumble Bee Cleaning Services take care of your post-renovation cleanup needs.